

It’s getting more important to have great photos nowadays isn’t it!! It’s not just about having good images for your website anymore, it’s now about having great shots of your work to put onto your Instagram, Facebook, Pinterest and Twitter feed as well. I’ve been meaning to write a blog explaining how to achieve good quality photos for you all for so long and (a whole year later) I’ve finally had time to sit and do it. I’ve broken it down into four parts so that you don’t get too overwhelmed with all the info and I’m pretty sure this is all you’ll need to start achieving gorgeous photos!!!
I struggled for years with a camera and editing tools on my Mac and even with Tripods and professional lighting my photos still never looked good. When you’ve spent an entire day working on a wedding cake the last thing you want to do is spend hours taking photos and getting no where with it all
However, a couple of years ago, I swapped my camera for my Iphone and I’ve never looked back. I tried lots of Apps and tried to get fancy with it all, but the reality is all you need is one good App, a little bit of time and the right light.
Surprisingly, an editing App plays a really small role when trying to achieve a great photo. An App can lighten and crop and correct but it has its limitations, it can’t fix a bad photo!!! If you can get a well lit shot of your cake/flower at the beginning, it will take you just minutes of editing to achieve something to be really proud of.


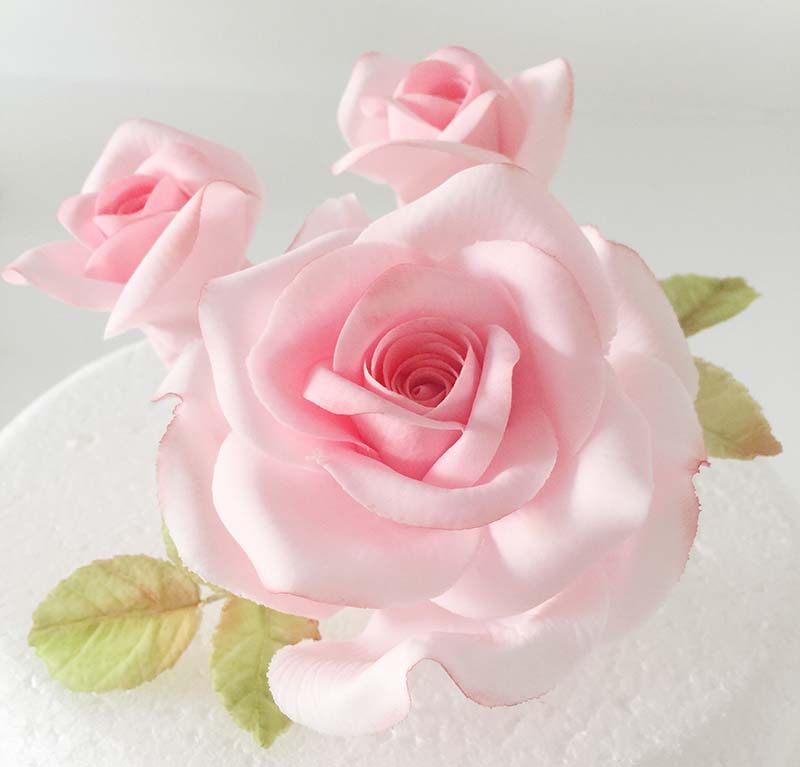
So, how do you get a well lit shot?? You don’t need expensive equipment to take a nice photo on your phone, you just need good, NATURAL daylight. Most light bulbs in the home give off a fairly dull glow and I’ve found that this gives sugar flowers and cakes that awful yellow tinge that make the photo look like something taken in the 70’s. The modern lighting in my Studio is just as bad, it’s great when I’m teaching but if I attempt to take a photo in the evening with the lights on, my flowers look really harsh and the colour looks very faded. It’s equally as important not to use a flash, so always remember to turn this off before you get started. A flash really destroys the natural beauty of your sugar flowers. So, if you just remember that natural daylight is a must, rather than artificial lighting, you are going in the right direction
I’ve found that the best time of day to take a photo using natural light is in the morning after 11am and before the sun starts to set in the evening. Wintertime kind of breaks these rules and it’s more a case of waiting for a slightly brighter day to come along or for that rare ten minutes during the day when the sun says hello. I’ve also discovered that too much sunlight shining onto the project will take a lot of the definition away from the petals and sides of the cake so avoid taking photos right next to a sunny window. This applies to outdoor shots too. If you put your cakes/sugar flowers in a slightly shadier spot away from the direct sunlight, you’ll get that gorgeous finish that we all strive to achieve
I spent quite a while finding the perfect spot in my Studio for taking photos but now I know where it is, its my “go too” place. It’s in the centre of the room, a few feet from the window, the light there is always bright and free of glare from the sunshine. Now, I simply finish a project, put everything in place and I’m ready to get started.
I kind of assumed that once I’d found my Go Too place and knew the times of day best for taking a shot that I’d cracked it, but I found that the position of the phone in my hands was relevant too. For example, if I tipped the phone forward slightly, there was more natural light hitting the screen and the photo was lovely and bright. If I tipped the phone down slightly, there was slightly less light hitting the screen and the photo came out slightly darker. It seems to love the light when I take shots with the window directly behind me too. I’m not sure if it’s an Iphone 6 thing or whether it relates to all other makes and models but I’ve found it to be a real asset. It takes a bit of patience to get the phone at the right angle and yourself in the correct standing position but it’s worth it. Start by taking a photo of the cake from the left, then tilt the phone slightly and take another photo, then tilt it and hold it slightly higher for the next shot, basically keep taking lots of shots at different angles and positions until you get the “one” Try this again standing to the right of your project and in front of it. As soon as you hit the right angle you will know, your photo will be light, bright and the flower or cake will look very natural and pretty
I’ll sometimes take about 20 shots before I get it right but I figure it’s worth it just to get something lovely and that will be really quick and easy to edit further down the line.
Things To Remember
- Find a place that’s well lit with natural daylight
- Avoid artificial lighting, turn lights off and rely on daylight
- Avoid sunlight shining directly onto your project, it will give an “over-exposed look”
- If you have to take a photograph outside on a really sunny day, make sure your project is in a shady area
- Always turn your flash off
- Make the most of natural daylight by working between 11am and when the sun sets in the evening
- Find your Go Too place, where the lighting is always bright and free of glare from the sun
- Take shots from all different angles – from the left side, right side, up high, down low
- Tilt the phone at different angles to allow different amounts of light to fall on the screen
In next week’s blog I’ll be telling you lots of fab stuff about Editing Apps, how they can lighten your photos AND create the depth of colour you need to make your projects really stand out!!! Don’t miss it, it’s a good one!!
Ali xx
My studio is just 35 minutes away from London on the high speed train link and for those driving, 10 minutes from the motorway with plenty of FREE parking.