Hopefully you’re all getting the hang of taking beautiful, well lit photos on your phone and itching to get started on the next step, EDITING!! This has always been my favourite part when it comes to creating photos for my Social Media, simply because I can get great results very quickly and move onto the next project without any stress.
(If you haven’t yet read Part 1, have a quick read here first)
 I’ve tried lots of editing Apps and found that they all have something to offer but my absolute favourite App by far is Snapseed, it’s really simple to use, has everything I need for editing and best of all it’s free. This is the App I’m going to talk about because it really is the perfect tool for creating a great photo in just a few minutes once you know how to use it properly
Once you’ve clicked on the App, head straight for the top left hand corner of the screen and click on Open. You’ll then be given three choices, Open from Device, Camera and Open latest image. I always click straight onto Open from Device because the image I want to use may not be the latest image and I don’t want to take a new photo using the Camera, I want to use one of the good ones I’ve just taken
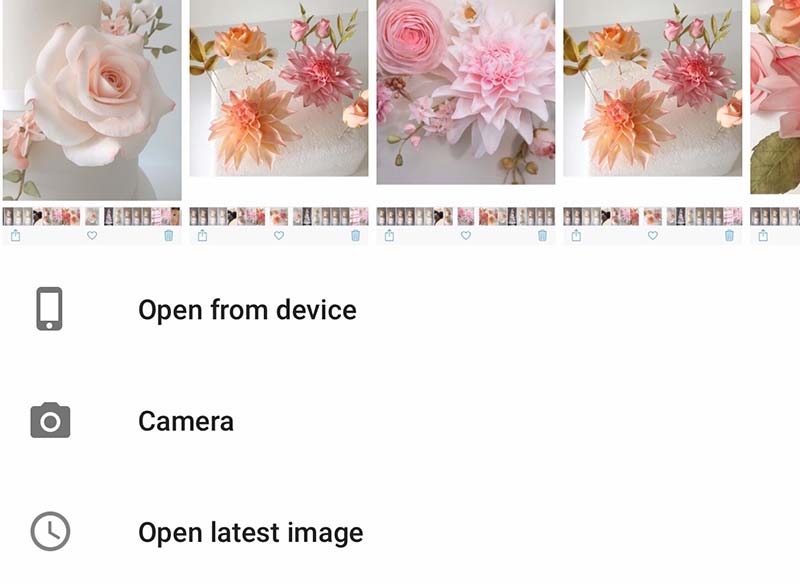
Now simply click on camera roll, tap on the photo you want to use and watch it pop up onto the screen. This is the fun part now as we get to make it look pretty!!!
At the bottom of the screen is the word TOOLS, if you click on this you’ll see a whole page of exciting tools to use. The one I use the most is Brush, so we’ll get started with this one
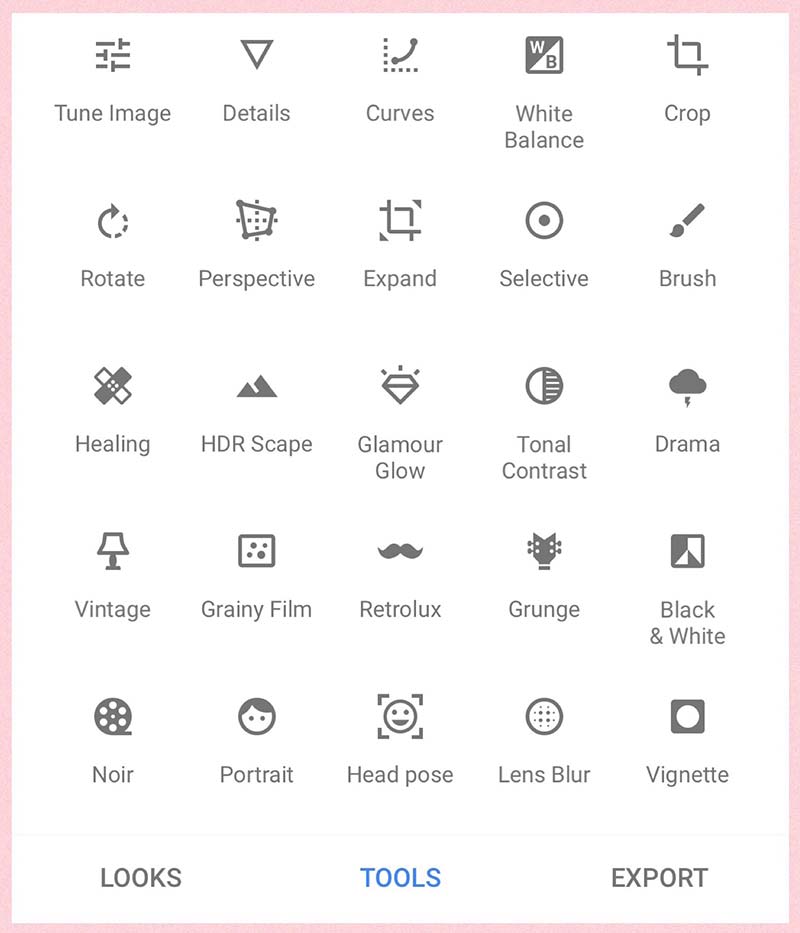
Brush is THE best tool on Snapseed as far as I’m concerned. In just a few simple swipes you can lighten the photo slightly (fab if you took the picture on a winters day) AND enhance the areas of your photo that you love the most. The screen will show four words at the bottom of the page, Dodge and Burn, Exposure, Temperature and Saturation. To be honest the only two I ever use is Exposure and Saturation. Temperature I’ve never found necessary and Dodge and Burn… well, the name has always put me off and I’ve never been brave enough to even look at it… yes, I am a wimp even when it comes to Apps!
We’ll start by clicking on Exposure, which in layman terms simply means “getting the photo slightly lighter or slightly darker”. Once you’ve clicked on Exposure there’s two little up and down arrows at the bottom of the page, with numbers in between them. If you have a quick play you’ll see that by clicking on the arrows the exposure goes from -1.0 to +1.0.
Once you’ve set it to the correct number you can then swipe across the entire photo with your finger to lighten it. My photos always look great when I swipe using +0.3 and +.0.7, anything more or less looks pretty awful.
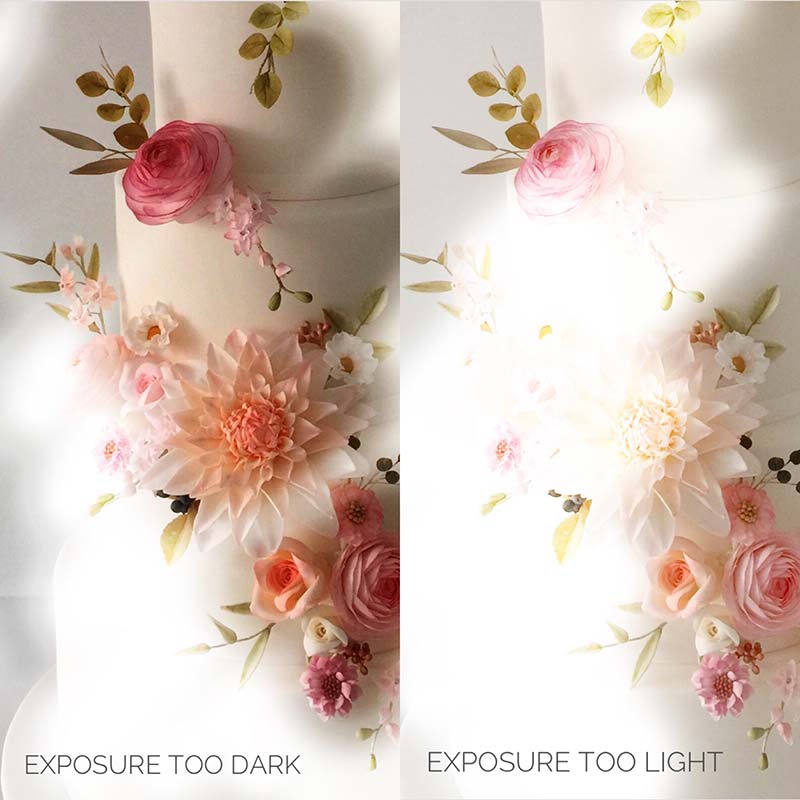
When I say swipe I mean scribble over the entire screen, backwards and forwards, up and down, round and round until you’ve changed the brightness of the whole picture. (try not to look like a mad man when you’re doing this, especially if you’re sitting on the train during rush hour)
If you think your photo is looking nice at the end of all the scribbling, click on the little tick sitting at the bottom right hand side of the screen. This little tick SAVES what you’ve just done. If the picture is too bright or too dark after you’ve swiped it, don’t worry, simply press the X in the left hand corner instead of the Tick (this will undo the work) and you can start again.
If you’ve lightened the photo, saved it and then realized you want it brighter still, just repeat the process a second time. Click back onto Tools, Brush and then back into Exposure, lighten some more and then save again using the Tick. Once you’ve done this a few times it will be really easy I promise!!
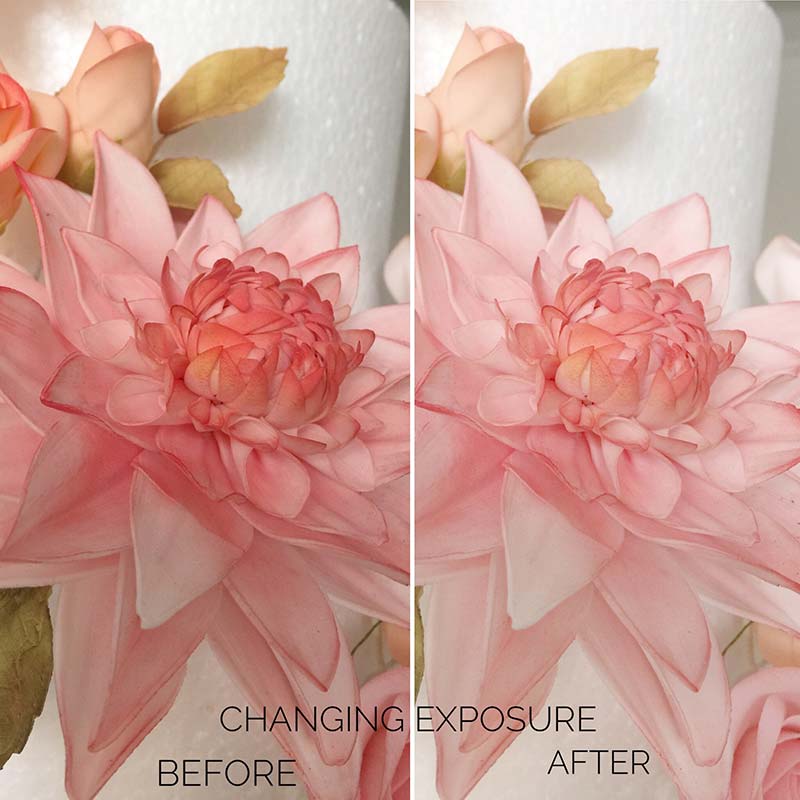
Hopefully, you now have a gorgeous, light photograph on your screen. A gorgeous, light photograph on your screen that’s lost some of it’s depth of colour though and now looks a bit wishy washy??. This bugged me for a while too until I realised this was easily fixed just by clicking on the Saturation button. This little button works exactly the same way as the Exposure button but instead of making the photo lighter or darker it actually gives colour more depth or lightens it slightly. It has the same up and down arrows as Exposure too so thankfully I found it easy to get the hang of. Nowadays, I always keep saturation on +5, I find this keeps everything natural looking. You have to be a bit more subtle with your swiping here too, otherwise you’ll end up with luminous flowers and bright yellow icing. (apparently, luminous clothes are making a comeback this summer, but I really don’t think this should apply to delicate sugar flowers and cakes do you) The art of this bit is to add colour in the centre of the flowers only, so just scribble your finger in tiny areas that need to be enhanced
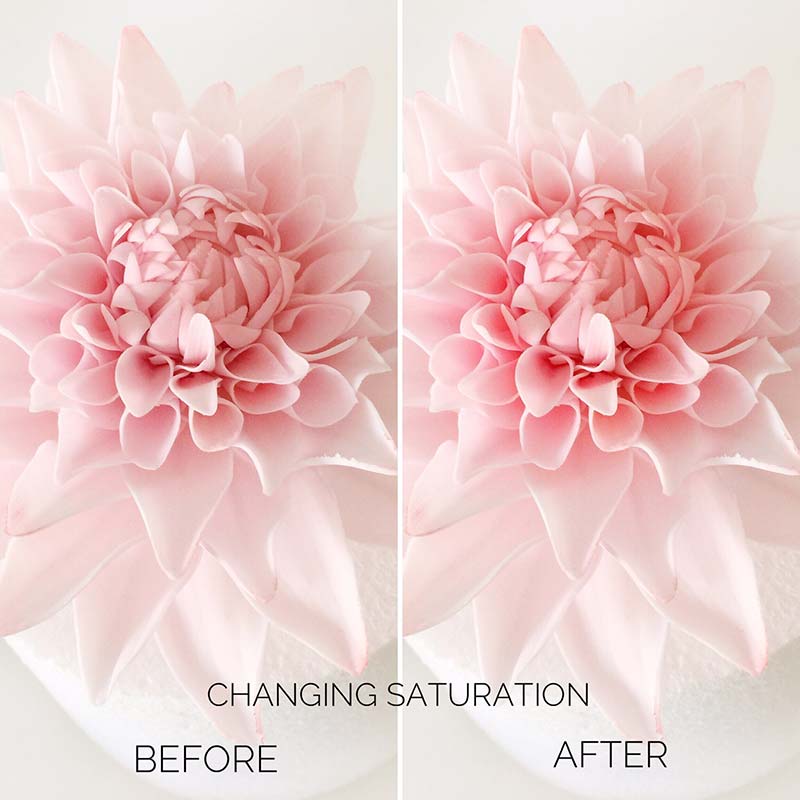
If you’ve made Toppers for a cake, scribble on their cheeks to make them look more rosy or on the hair to make it a deeper colour. This can really bring your photo to life and is quite fun to do. If you are anything like me you’ll over play with the Saturation making the whole thing so bright it can be seen from the moon, but have your fun, hit the X to “undo” and start again if needs be.
Once it’s looking great, click on the Tick and save it
At this stage you might love the photo and be ready to save it to your files properly. Click on the word Export sitting at the bottom right hand corner of the screen and then click on Export again when it shows up on the next screen. You can Export your photos at any stage, just remember that once you’ve exported them they can’t be changed. Once you’ve exported the photo it automatically goes into your Camera Roll and Snapseed folders. Snapseed is a great little folder to sit amongst your photos on your phone, it keeps all of your edited pictures in one place … something I find a great help when I feel the urge to show my work off to a random stranger or a potential new bride
In next week’s blog I’ll be telling you lots of fab stuff about Healing Tools, Fixing flaws, Cropping and really taking your photos to the next level!!! Have fun and don’t forget to email me if you get stuck with anything [email protected]
Ali xx
Newsletter
My studio is just 35 minutes away from London on the high speed train link and for those driving, 10 minutes from the motorway with plenty of FREE parking.
